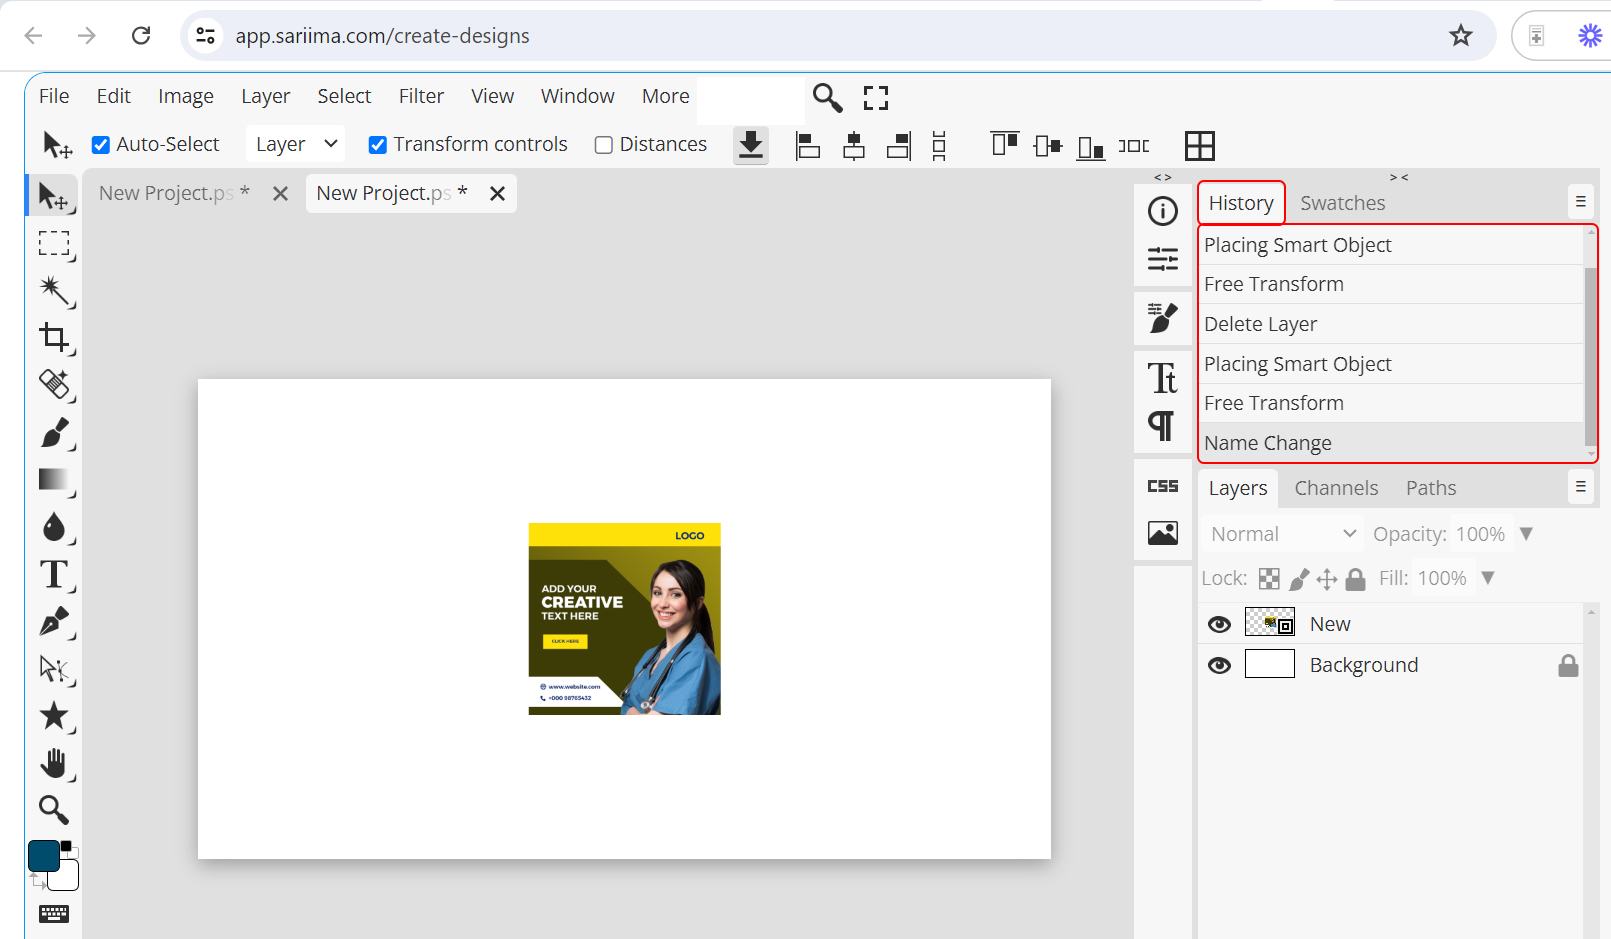
History Tool in Sariima
1. Introduction to the History Tool
What is the History Tool?
- The History Tool in Sariima tracks all actions and changes made during your editing session.
- It allows you to navigate through different states of your project, making it easy to undo or redo actions.
Importance of the History Tool:
- Enables non-destructive editing by allowing you to revert to previous states without permanently losing any work.
- Improves workflow efficiency by providing a clear record of changes and edits.
2. Accessing the History Tool
Locating the History Panel:
- Open Sariima:
- Open your web browser and go to Sariima.
- The Sariima interface will load, which resembles Adobe Photoshop.
- Enable the History Panel:
- If the History panel is not visible, go to the top menu and click on “Window.”
- From the drop-down menu, select “History.” The History panel will appear, usually on the right side of the workspace.

3. Navigating the History Panel
Understanding the History Panel:
- View Actions:
- The History panel lists all actions performed in the current session in chronological order.
- Each action is recorded as a new state, providing a timeline of your edits.
Selecting States:
- Revert to Previous State:
- Click on any state in the History panel to revert the canvas to that specific point in time.
- The canvas will update to reflect the changes made up to that point.
4. Undoing and Redoing Actions
Undo Actions:
- Undo Last Action:
- Press “Ctrl + Z” (Windows) or “Cmd + Z” (Mac) to undo the last action.
- Alternatively, click on the previous state in the History panel to undo multiple actions at once.
Redo Actions:
- Redo an Undone Action:
- Press “Ctrl + Shift + Z” (Windows) or “Cmd + Shift + Z” (Mac) to redo an undone action.
- Click on a more recent state in the History panel to redo multiple actions.
6. Best Practices for Using the History Tool
Save Regularly:
- Save Work:
- Regularly save your work to avoid losing progress in case of unexpected issues.
- Save different versions of your project to maintain a clear record of major milestones.
Use History States for Experimentation:
- Experiment Safely:
- Utilize the History panel to experiment with different edits and effects.
- Revert back to previous states if the changes don’t work out as planned.
Combine with Layer Management:
- Manage Complex Edits:
- Use the History tool in conjunction with layers to manage complex edits effectively.
- Make significant changes on new layers to revert individual layers without affecting the entire project.
By following this detailed step-by-step tutorial, you can effectively use the History Tool in Sariima to manage and track your edits, enabling a flexible and efficient workflow.