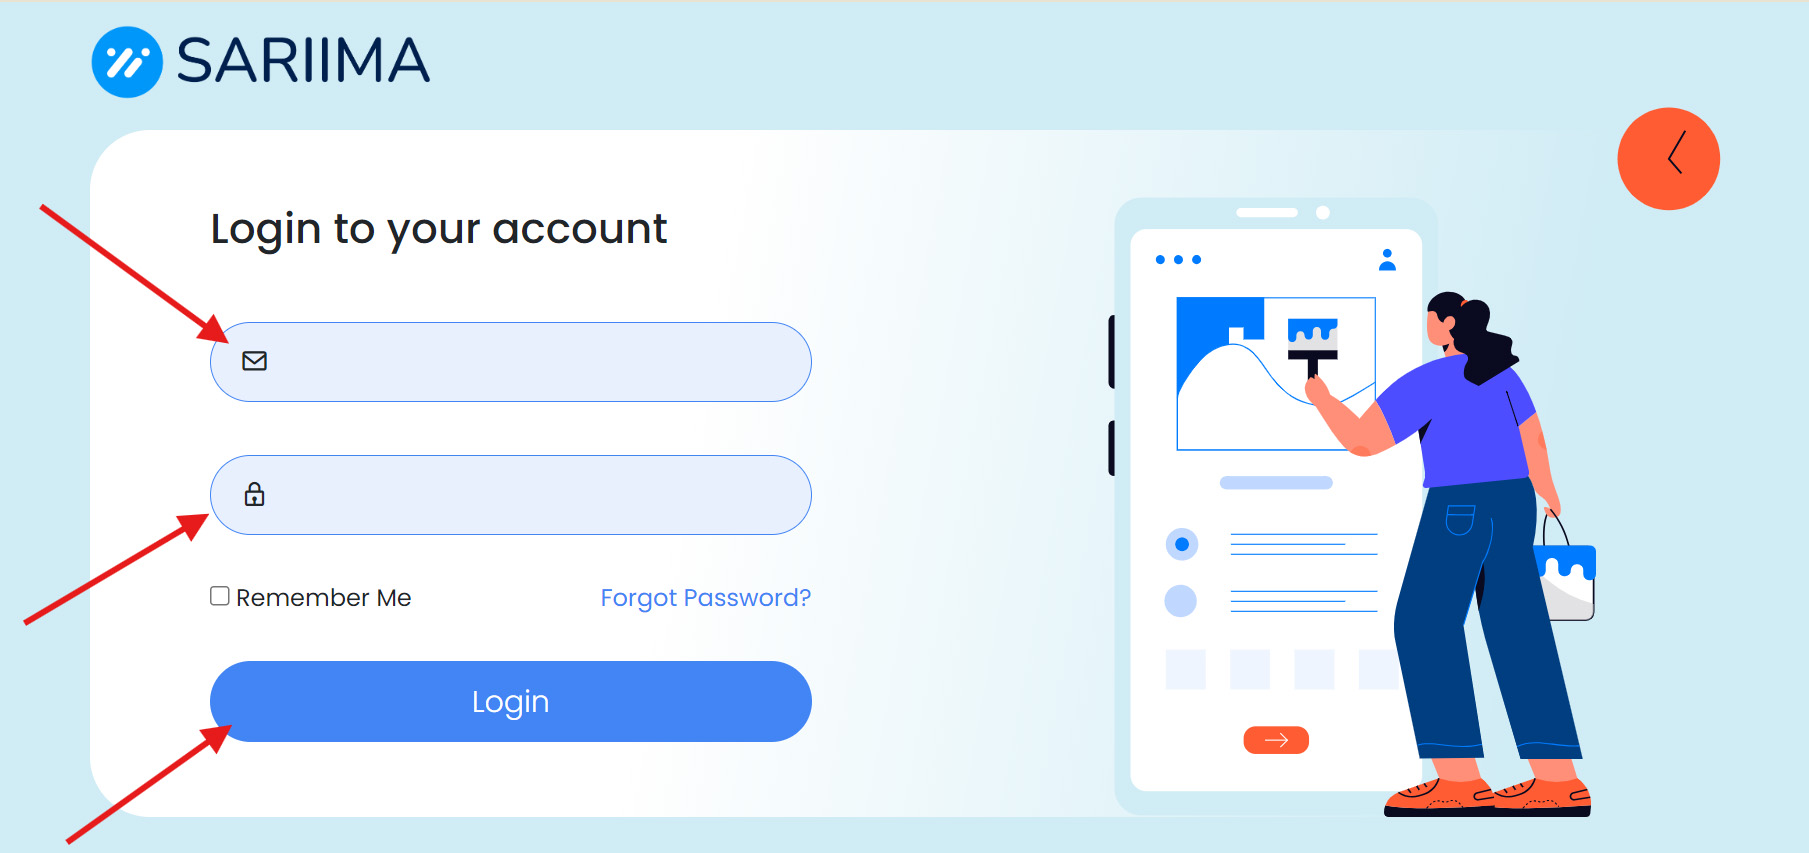
Step 1: Firstly, Login into your Sariima App
When you are successfully Logged in, you will see an intuitive Dashboard such as this one in the screenshot below. The Dashboard Shows all your Sariima Features. And you will find the “Design Studio App feature” at the left hand side of the Dashboard.
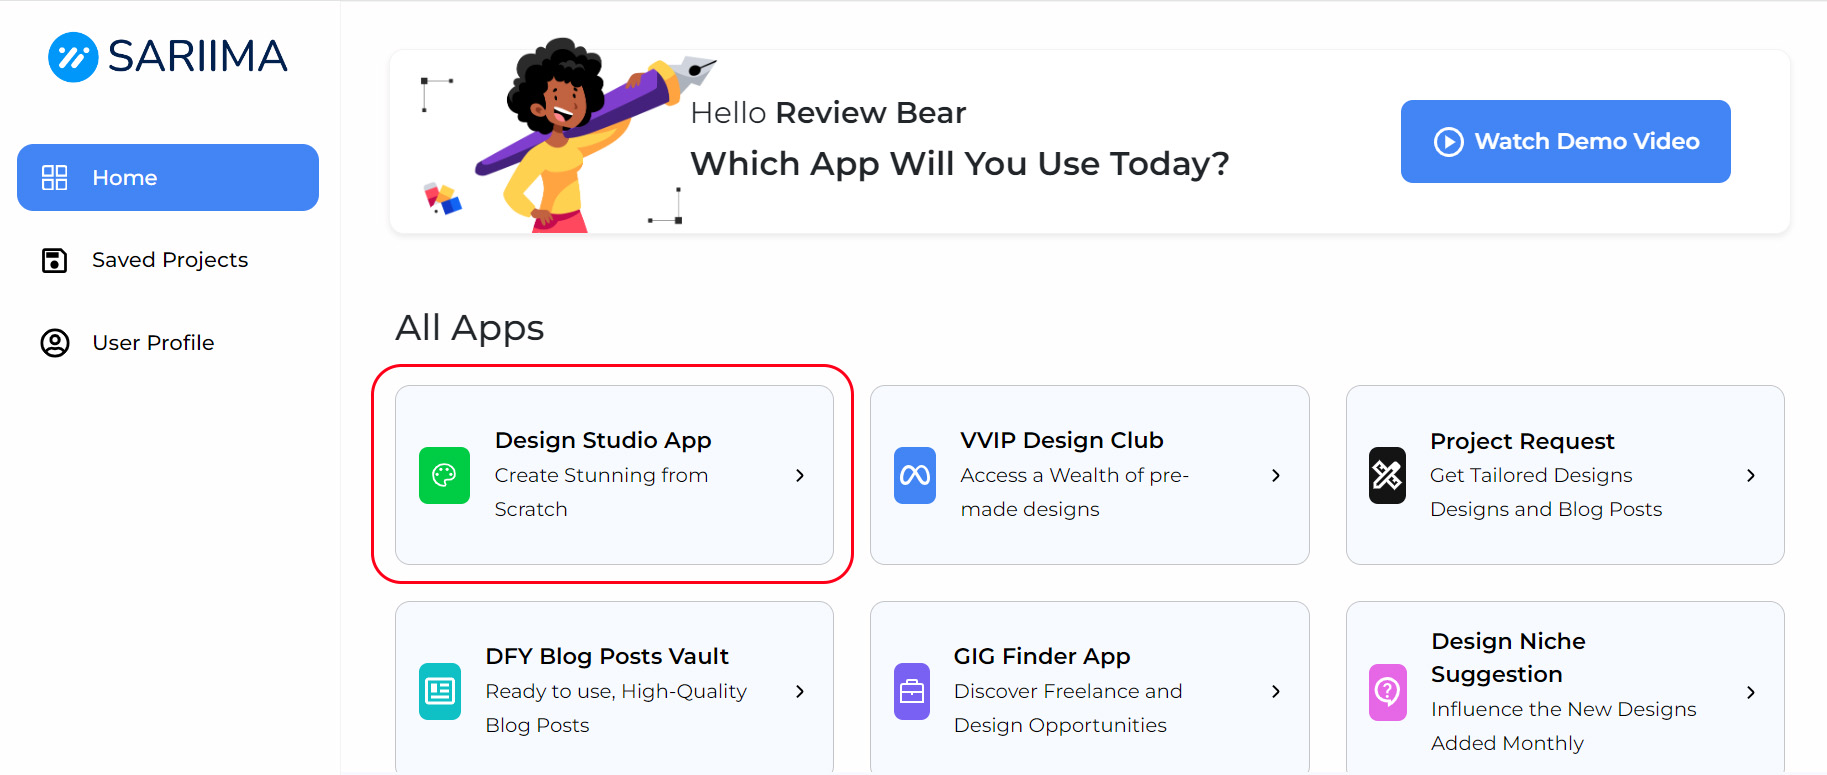
Step 2: From the Sariima dashboard, navigate to the Design Studio App section and Click on it. This will open a new interface such as this.
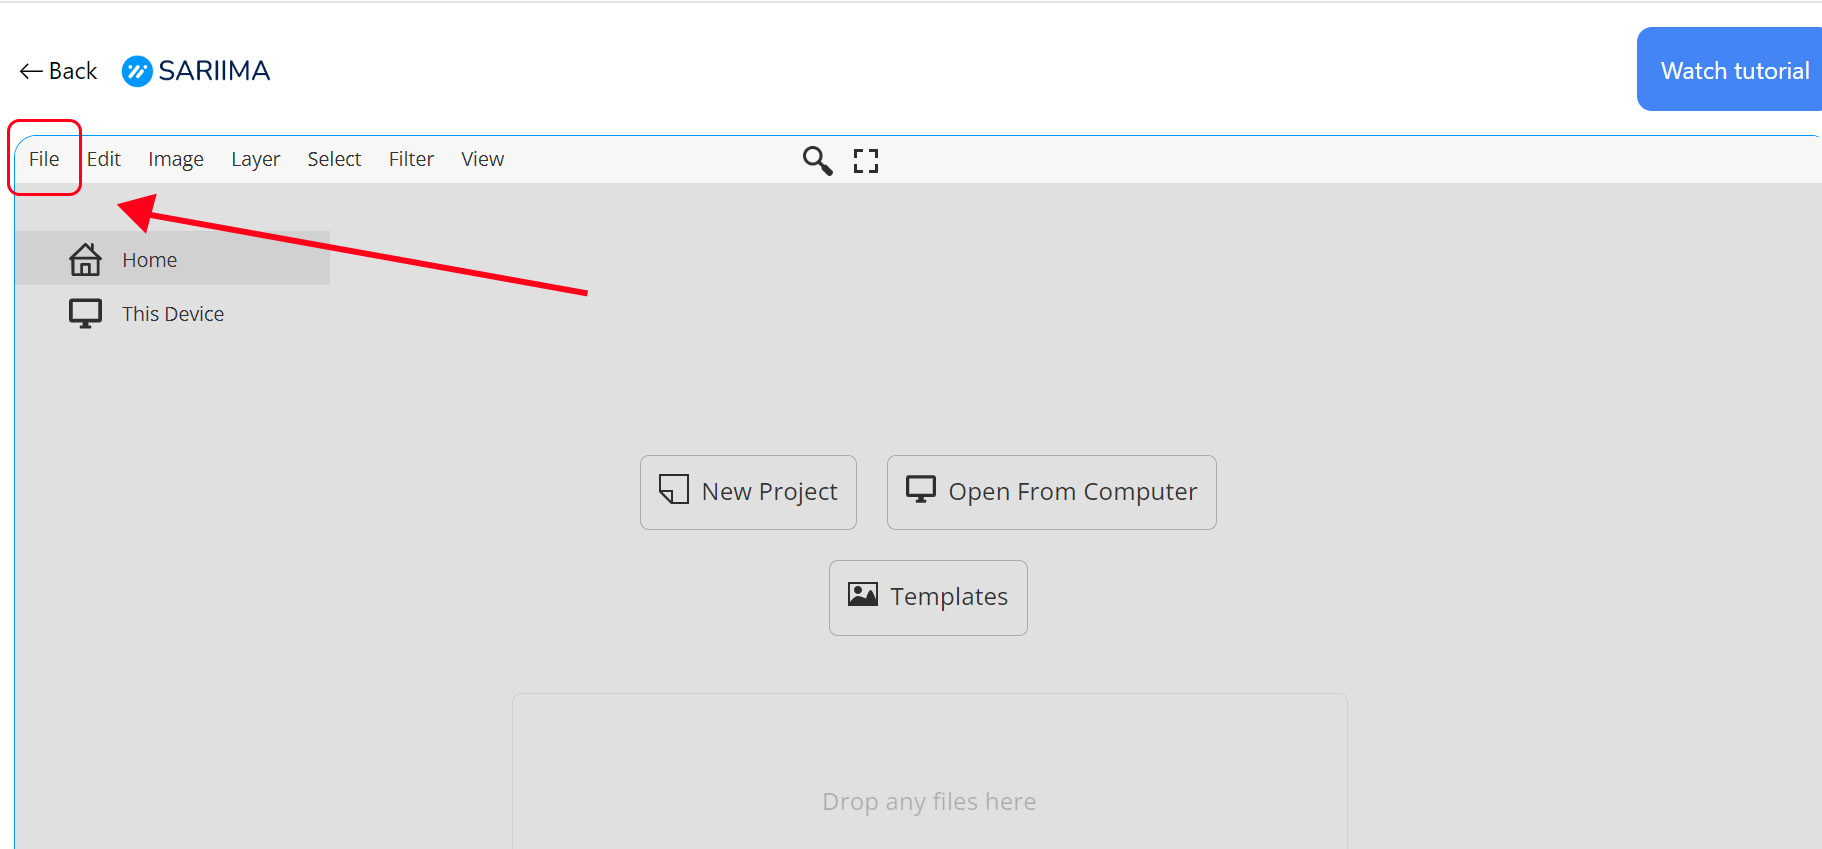
Step 3: To Start a New Project Window: Click on File in the top menu bar.
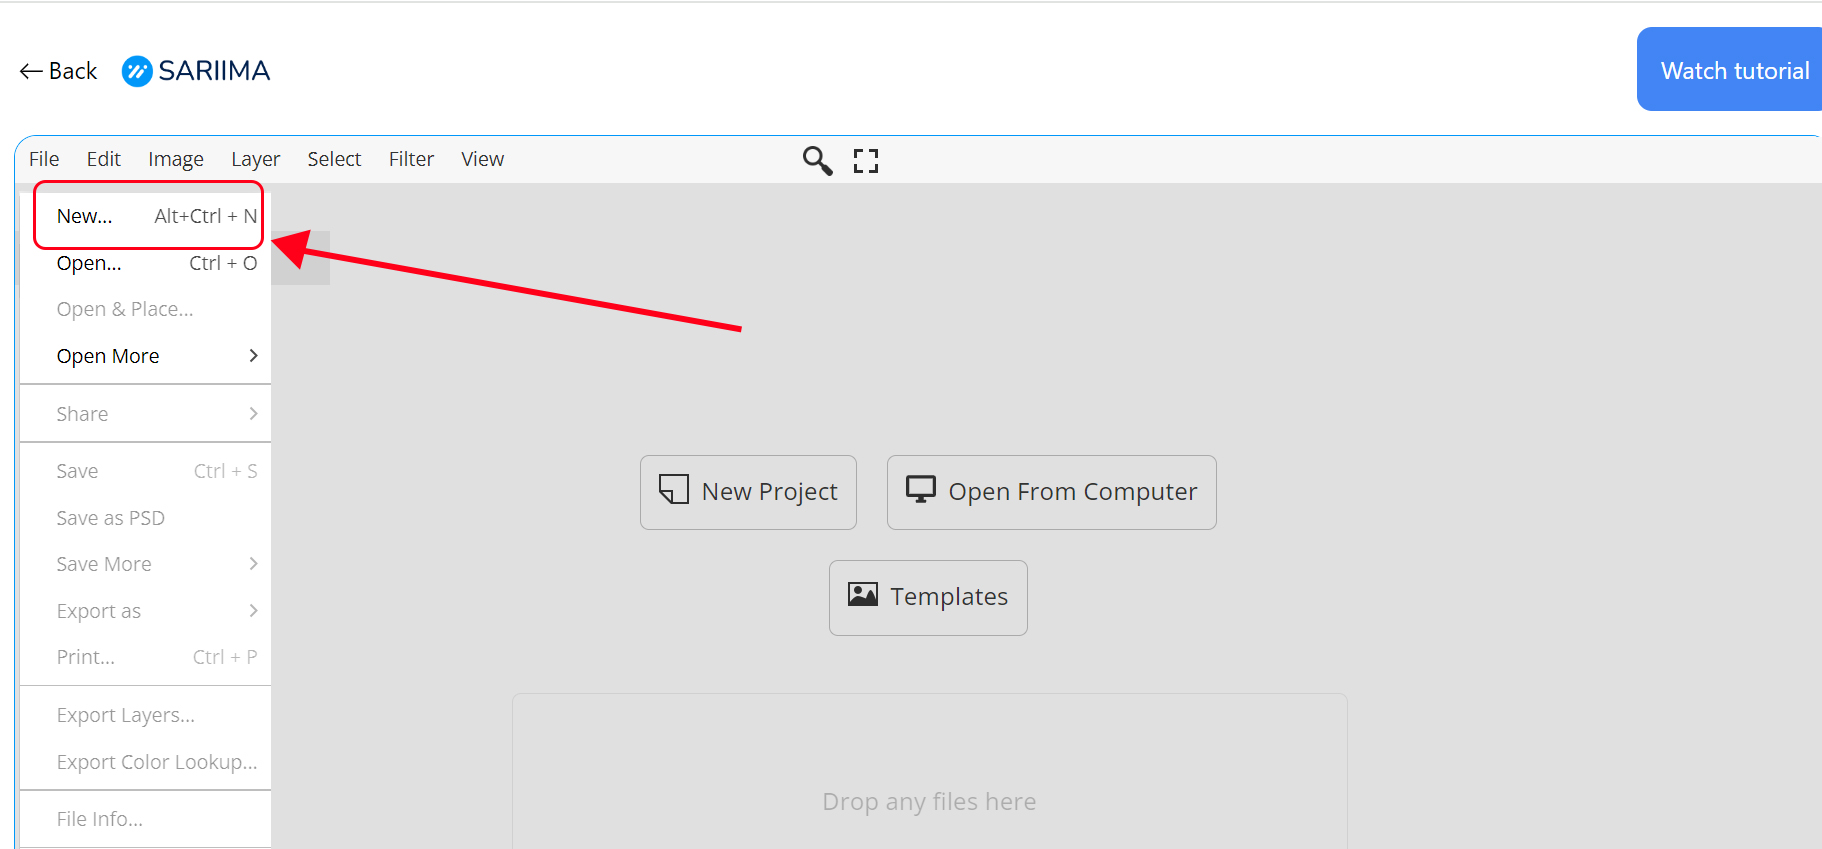
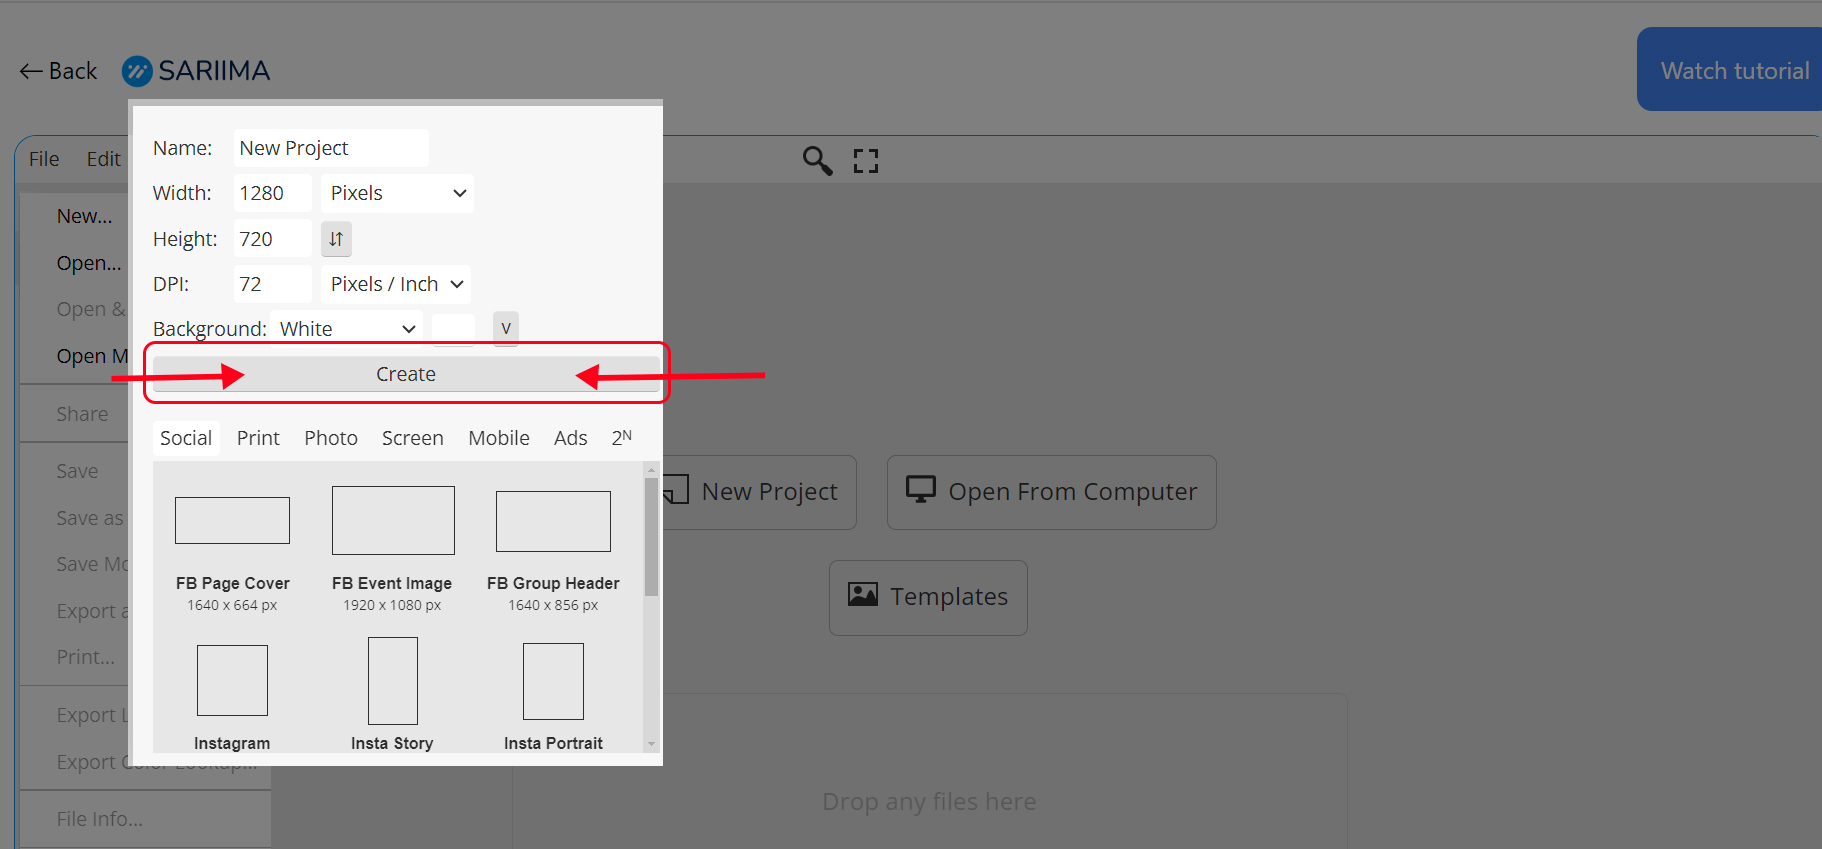
Step 4: Select New… from the dropdown menu. This will open the New Project window where you can set up your new canvas.
Step 5: At the top of the New Project window, enter a name for your project in the Name field (optional but helpful for organization).
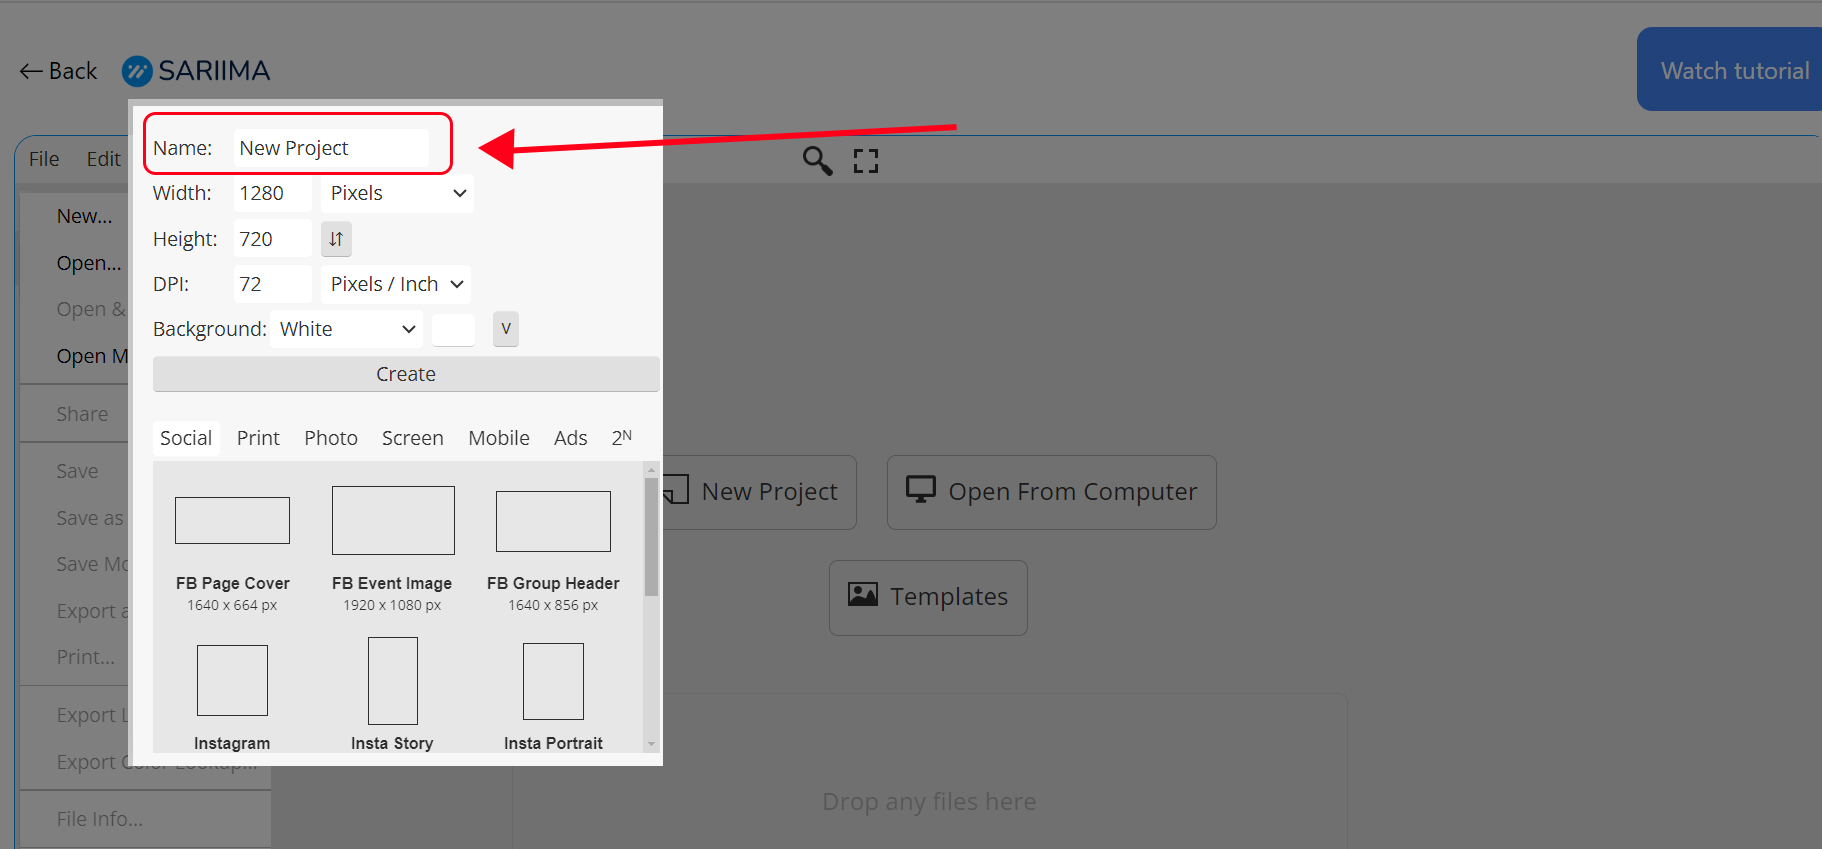
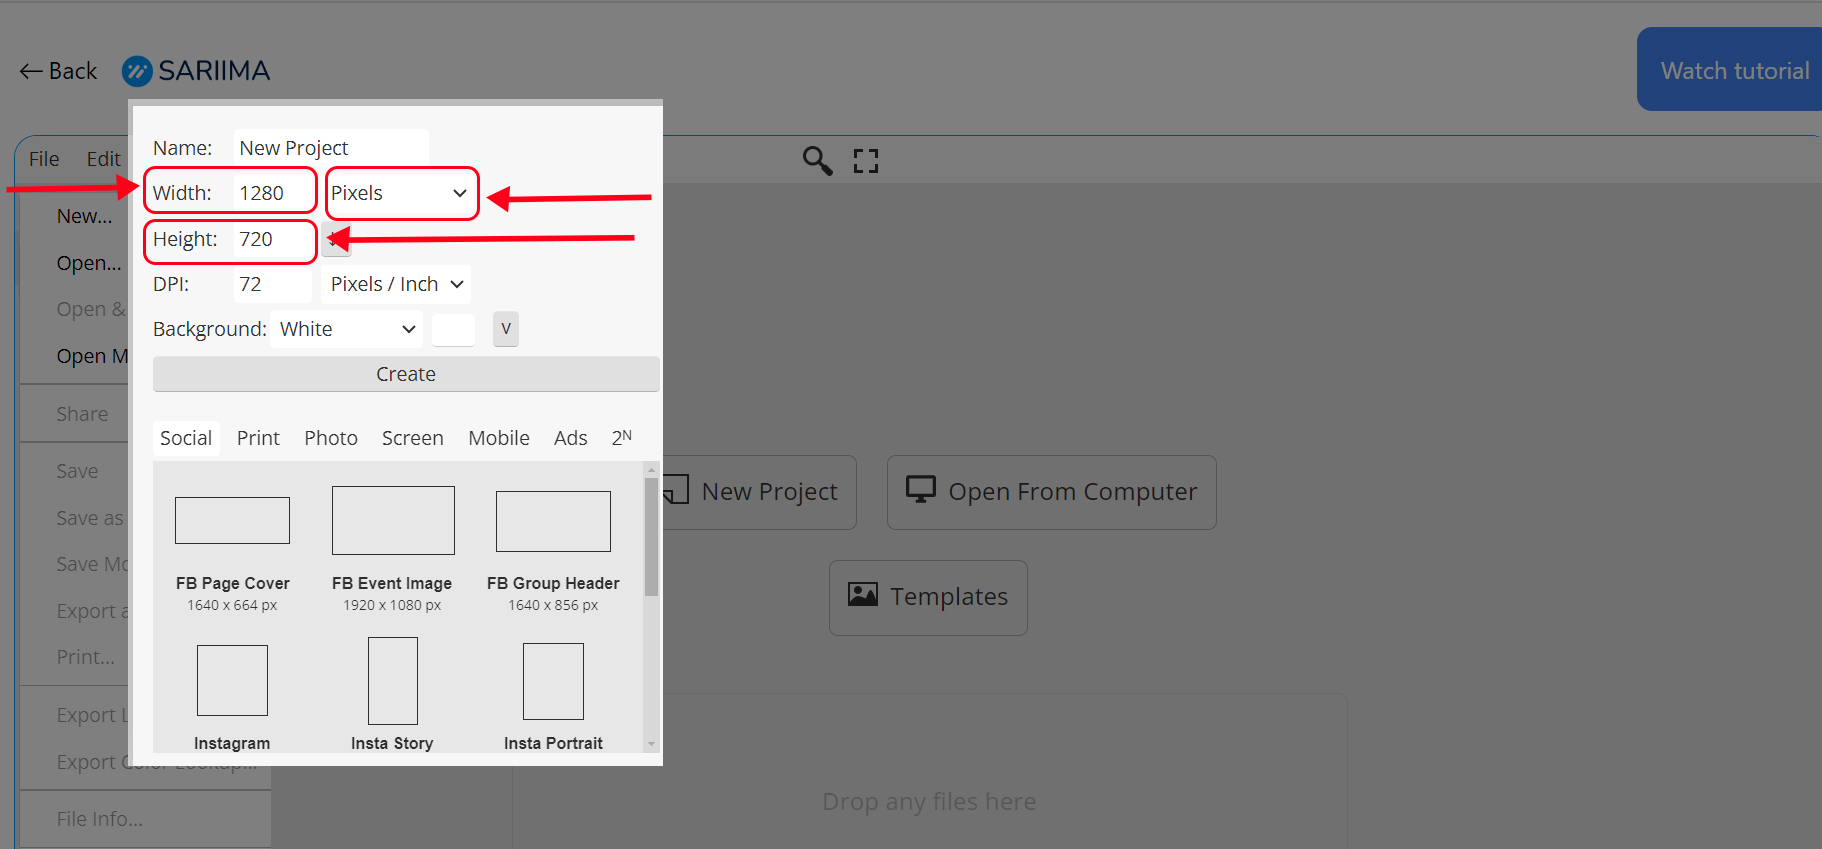
Step six: Enter the desired dimensions for your canvas in the Width and Height fields. You can change the units (pixels, inches, centimeters, etc.) using the dropdown menu next to these fields.
Step 7: Set the resolution (DPI) for your project. A standard web resolution is 72 DPI, while print projects usually require 300 DPI.
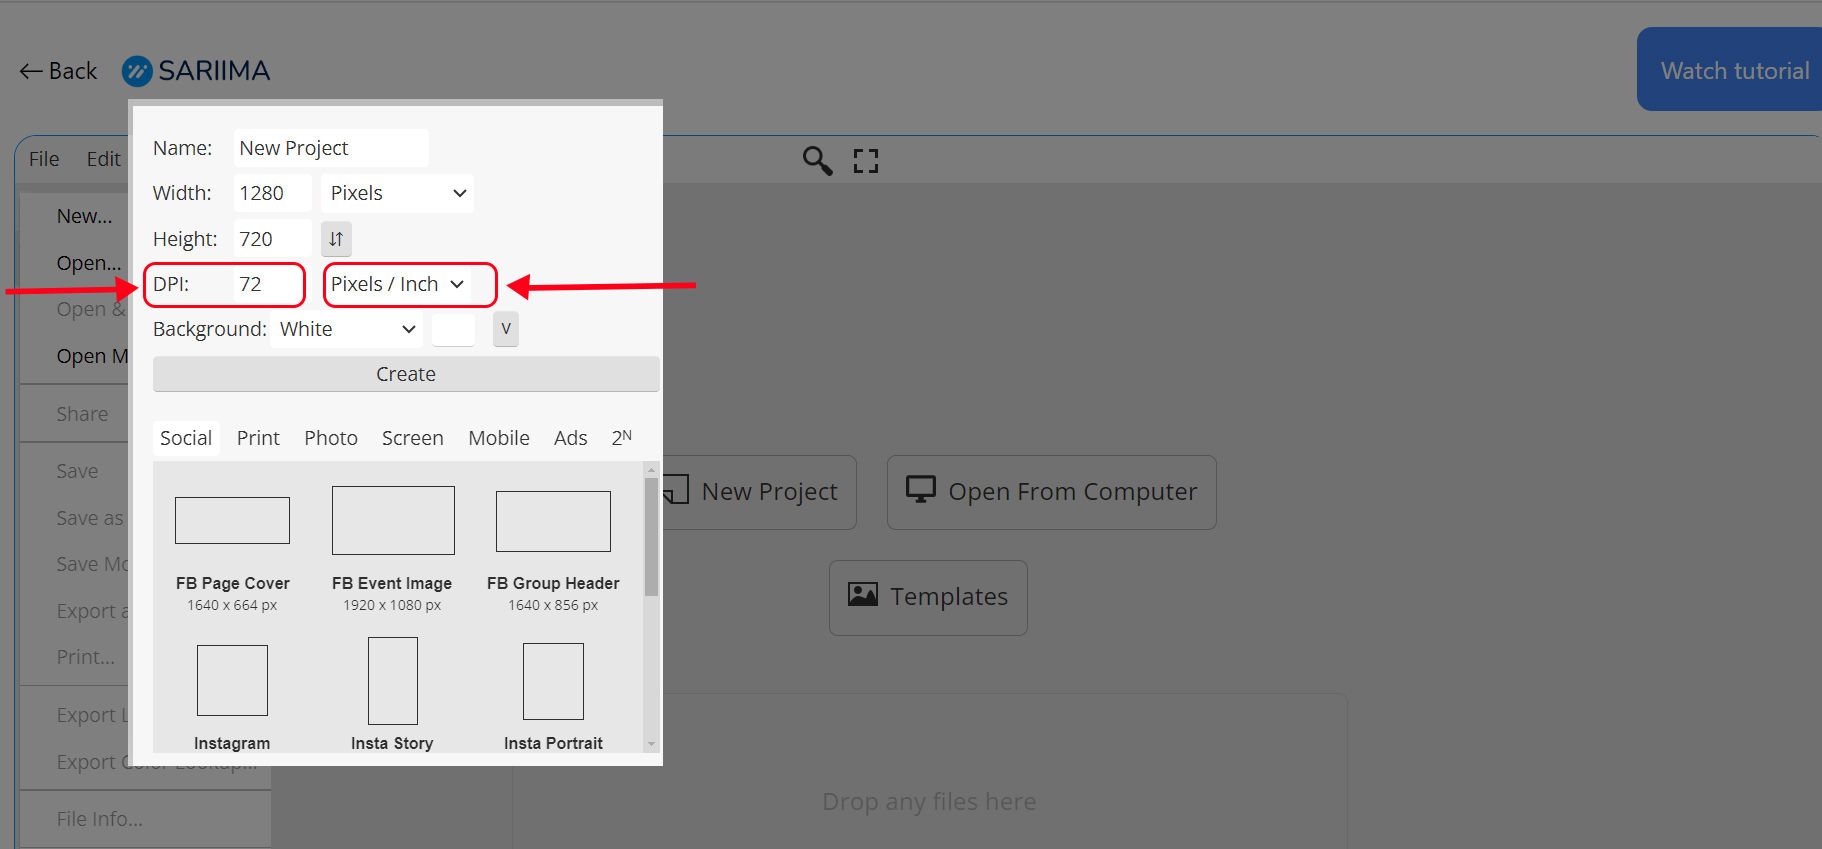
DPI stands for “dots per inch.”
DPI is a measure of how detailed an image will appear in print. Higher DPI values produce more detailed and higher-quality images, essential for professional print materials, while lower DPI values are sufficient for web and digital use.
A standard web resolution is 72 DPI, while print projects usually require 300 DPI.
Step 8: Select the background content for your canvas and Click on the “Drop Down”
Options include:
White: Select the “White” option to set your background to white.
Transparent: Select the “Transparent” option for a transparent background.
Custom: Click the color box next to “Custom” to open the color picker, where you can choose any color for your background.

Additional Tips:
- Changing Background Color Later: If you want to change the background color later, you can create a new layer, fill it with your desired color, and move it to the bottom of the layer stack.
- Use Transparency for Overlays: Transparent backgrounds are especially useful when you plan to export your design as a PNG file to maintain the transparency for use in other projects.
- Custom Backgrounds for Branding: Use custom colors to maintain brand consistency across various design projects. You can save frequently used custom colors for easy access.
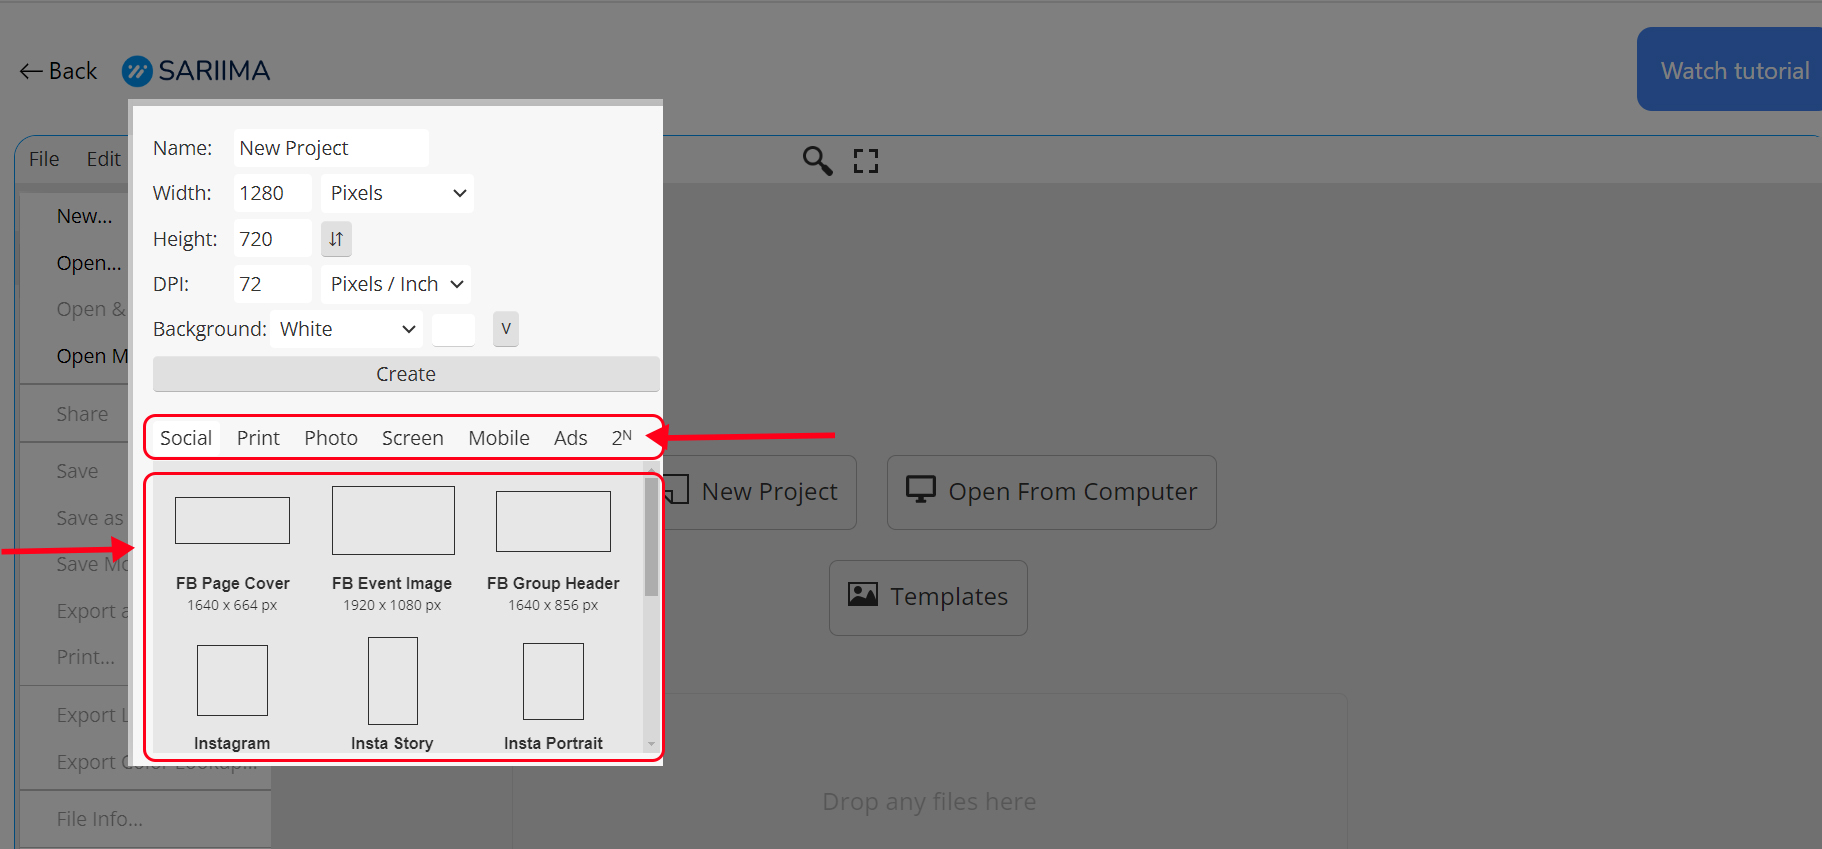
Step Nine: You can also choose from pre-set dimensions tailored for various social media platforms. Select from options such as:
- Instagram Post: 1080 x 1080 pixels
- Facebook Cover: 820 x 312 pixels
- Twitter Header: 1500 x 500 pixels
- YouTube Thumbnail: 1280 x 720 pixels
- Pinterest Pin: 735 x 1102 pixels
- And more…
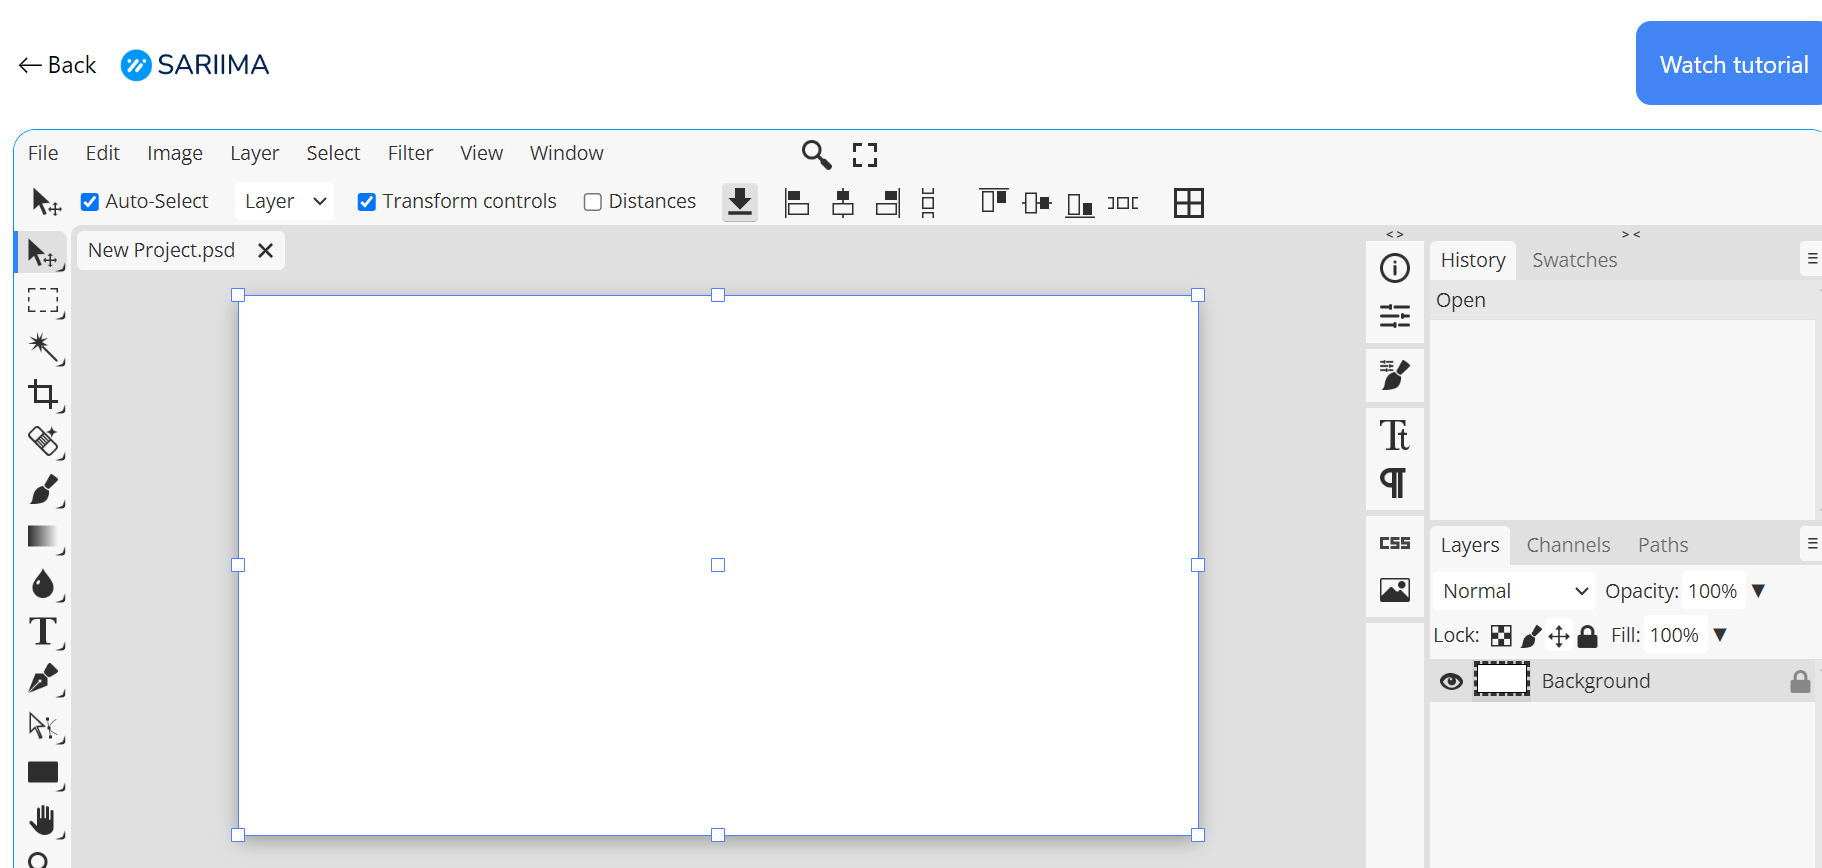
Step 10: After setting your dimensions and background, click the “Create Button” at the botom of the New Project window. Your new canvas will be created and displayed in the workspace.
After clicking the “Create” button, your new canvas will appear in the Studio, ready for you to start designing. You can see the screenshot below for a visual reference. In our next tutorial, I will guide you step-by-step on how to easily navigate through the design interface.